$250.00

Life Time Use - One Year Update

25% Discount on Renewal

Important: This plugin is an add-on that requires the Edubooking system be installed and activated. 

Edubooking Custom Fields

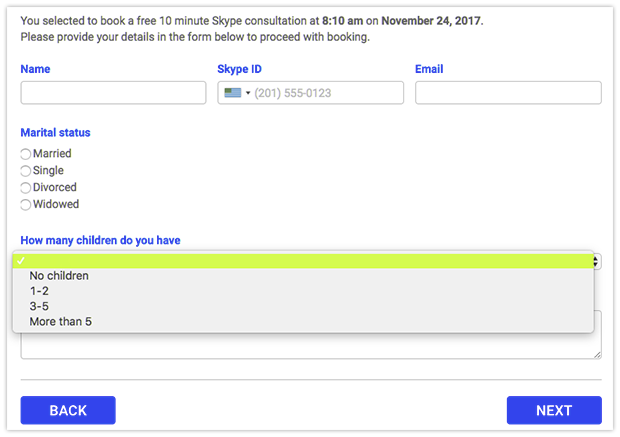
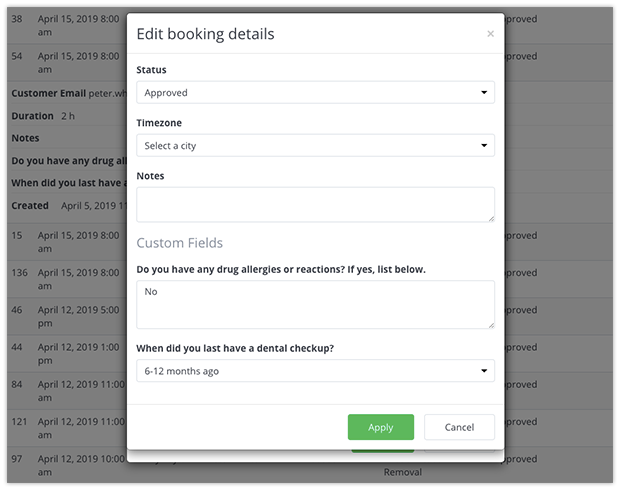
By default, there are several fields like name, phone number, and email address, to be filled out by your clients before they confirm the booking.

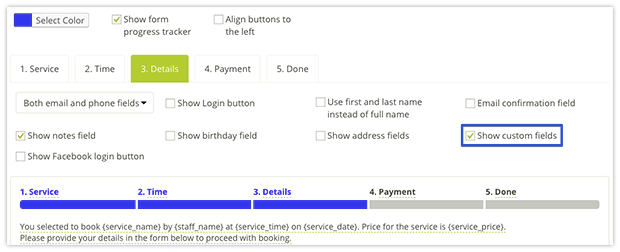
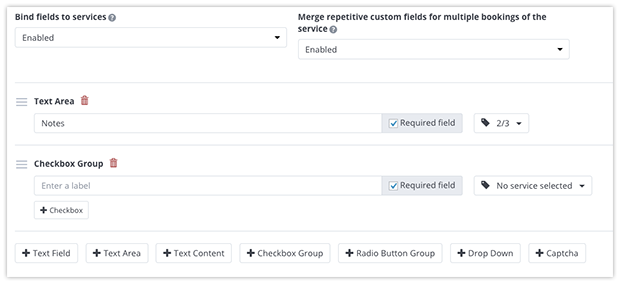
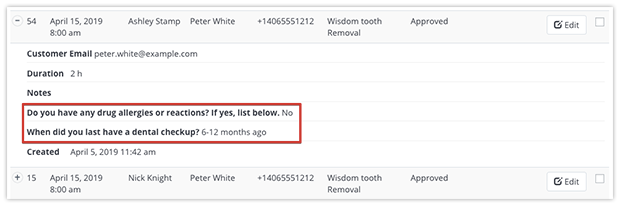
With Custom Fields add-on, you can add extra fields to ask your students for more details, or any kind of information. These fields will appear at the Details step of the booking process, and reservation details will be added to your Edubooking Calendar.

User Experience

Features:

  • Create as many items as you need;
  • Different types of questions (text fields, drop-down lists, multiple choices, etc.);
  • Make fields required or optional.

Before your students set up their courses, you may want to know some general information, ask specific questions, or require more personal details.

In the default Edubooking configuration, your customers are required to provide minimum data, such as name, phone number, and email address.

Edeubooking Custom Fields add-on allows you to create as many items as you need. Choose from the different types of questions, make them required or optional, and add them to the Details step of the booking process. When your students book a course, they’ll see custom fields to be filled out before the booking confirmation. When the student completes the booking, all reservation details will be added to your Edubooking Calendar. This info can also be added to the email notifications for both your instructors and students by adding the {custom_fields} shortcode to the email body. Please note that the {custom_fields} shortcode is only available for single notifications.

Setup and configuration

1. Purchase,  and activate add-on in Plugins.

2. In Edubooking menu > Appearance > Details tab, make sure that the box next to the ‘Show custom fields’ option is checked.

3. You will see a Custom fields tab in the left sidebar menu in Edubooking menu. To add a custom field, select the type* of it, press + button and enter the question.

All custom fields can be rearranged just as you need by dragging the sandwich icon. Extra fields will appear on the Details step of the booking process, just below the personal info fields.

4. If you select the custom field to be a Required field, your students won’t be able to complete the booking before they answer your questions.

5. If you’ve enabled the Bind fields to course option, you’ll be able to create course-specific custom fields. It means that you can ask for different info depending on the course the client is booking. See the drop-down list next to the created custom field and mark the checkbox for relevant services.

6. In order not to show repetitive custom fields at the Details step (for example, when students book multiple instances of the service), you can enable the feature of merging them into one field.

All info entered by your clients in custom fields in the booking form is available in the course section (press + for non-widescreen monitors).

You can edit this info if necessary. Click Edit to see the booking details, then click on the student’s name and make the changes. Click Apply and then Save.

*Custom fields types

  • Text field can be filled in by the student.
  • Text area – an element of the booking form interface, which you can place above or below the fields that students will have to fill out (or choose an option from).
  • Text content will be displayed as simple text.
  • Checkbox Group – students will be able to choose several options within a group of choices.
  • Radio Button Group is a list of elements with only one possible choice.
  • Drop Down – students will be able to choose one answer from the list.
  • Captcha is used to determine whether a user is a human, or not.


Buy this plugin now

Please make sure to follow all the steps required in this transaction to make sure you perches will be secure and system setup environments are correct, will take care of that for FREE. We care about our clients business by avoiding errors.

Important step after perches

After payment approval,  you will need to send your WordPress login info for free install and setup:

1- Temporary admin user

2- Our system can be used for the multi-business industry so will need: Admin FTP Account (User & Password), for setup the industry luggage require, (Courses, Programs, Services, Appointments, Events, etc).

4- Make sure to remove the temporary admin user after we finish the setup.

5- your plugin will be licensed directly from the developers with 100% source validation plus risk-free by 14 days money back graduation.

Before purchases, please read our terms and conditions.